Preserving Perfection: Master the Art of Pickling with our Step-by-Step Recipes
- Benefits of Pickling
- Essential Equipment for Pickling
- Choosing the Right Ingredients
- Preparing the Brine Solution
- Preparing the Vegetables/Fruits for Pickling
- Adding Flavor Enhancers
- Properly Sterilizing Jars
- Filling Jars with Pickling Solution
- Sealing and Storing Pickled Foods
- Pickling Troubleshooting Tips
- Creative Pickling Ideas
Pickling is an ancient preservation technique that has been used for centuries to extend the shelf life of fruits and vegetables. It involves immersing food in a brine solution or vinegar, along with various spices and flavorings, to create a tangy and flavorful product. Pickles are not only delicious but also offer numerous health benefits. In this article, we will guide you through the art of pickling, from choosing the right ingredients to properly sterilizing jars. Get ready to unlock the magic of homemade pickles!
Benefits of Pickling
Pickling is not just a culinary technique; it's an art form that has been practiced for centuries. The process of pickling involves preserving fruits, vegetables, and even meats in a brine solution or vinegar, which not only extends their shelf life but also enhances their flavors. But beyond the practical benefits of preservation, pickling offers a plethora of advantages that make it worth exploring.
First and foremost, pickling allows you to enjoy seasonal produce all year round. By pickling fruits and vegetables at their peak freshness, you can savor their vibrant flavors and nutrients long after they have gone out of season. This means you can relish the taste of summer tomatoes or crisp cucumbers even during the cold winter months.
Furthermore, pickled foods are packed with probiotics, which are beneficial bacteria that promote gut health. These live cultures aid digestion and boost your immune system, contributing to overall well-being. So not only are you preserving food, but you're also nourishing your body with these naturally occurring probiotics.
Another advantage of pickling is its ability to enhance the taste and texture of ingredients. The process infuses the fruits or vegetables with the flavors of spices, herbs, and other aromatic ingredients added to the brine solution. This results in a unique combination of tanginess, sweetness, and spice that adds depth to any dish.
Moreover, homemade pickles allow for endless creativity in flavor combinations. You can experiment with different types of vinegars or add various spices like dill seeds, mustard seeds, or chili flakes to customize your pickles according to your taste preferences. This versatility ensures that there's a pickle for every palate.
Lastly, pickling reduces food waste by extending the lifespan of perishable items. Instead of letting excess produce go bad and end up in the trash bin, you can transform them into delicious pickles that can be enjoyed for months on end.
In conclusion, the benefits of pickling go far beyond preservation. From enjoying seasonal produce year-round to promoting gut health and enhancing flavors, pickling is a culinary technique that adds magic to every bite. So why not embark on your pickling journey and experience the wonders of homemade pickles?
Essential Equipment for Pickling
When it comes to pickling, having the right equipment is essential for success. Here are a few key tools you'll need:
1. Glass Jars: Opt for jars with airtight lids, as they will help maintain the freshness and flavor of your pickles.
2. Canning Funnel: This funnel makes it easier to fill jars without spilling brine or vegetables everywhere.
3. Large Pot: A large pot is necessary for boiling the brine solution and sterilizing the jars.
4. Kitchen Tongs: Tongs are useful for handling hot jars and lifting them out of boiling water.
5. Cutting Board and Knife: You'll need these for slicing or chopping vegetables and fruits before pickling.
6. Measuring Cups and Spoons: Precise measurements are crucial when preparing the brine solution.
7. Colander: A colander helps drain excess liquid from washed vegetables before pickling.
8. Wooden Spoon: Use a wooden spoon to stir the brine solution and mix in any spices or herbs.
Having these essential tools on hand will make your pickling process much smoother and more enjoyable.
Choosing the Right Ingredients
When it comes to pickling, choosing the right ingredients is crucial for achieving delicious and flavorful results. Start by selecting fresh vegetables or fruits that are in season and at their peak of ripeness. This will ensure that your pickles have a vibrant taste and texture.
For vegetables, opt for firm varieties such as cucumbers, carrots, cauliflower, and green beans. Avoid using overripe or soft vegetables as they may turn mushy during the pickling process.
When it comes to fruits, consider options like apples, pears, peaches, or even watermelon rinds for a unique twist. Make sure the fruits are not overly ripe to maintain their shape and texture.
Additionally, choose high-quality spices and herbs to enhance the flavor of your pickles. Common options include dill seeds, mustard seeds, black peppercorns, garlic cloves, bay leaves, and red pepper flakes. Experiment with different combinations to create your own signature blend.
Lastly, don't forget about the vinegar. It's important to use a vinegar with at least 5% acidity to ensure proper preservation. Popular choices include white vinegar, apple cider vinegar, rice vinegar, or malt vinegar. Each type of vinegar will impart its own distinct flavor profile to the pickles.
By carefully selecting your ingredients based on freshness and quality, you'll be well on your way to creating mouthwatering homemade pickles that will impress family and friends alike.
Preparing the Brine Solution
Preparing the Brine Solution is a crucial step in pickling. The brine acts as a preserving agent and imparts flavor to the vegetables or fruits. To make the brine, combine equal parts water and vinegar in a saucepan. Use white vinegar for a neutral taste or apple cider vinegar for a slightly sweeter flavor. Add salt to taste, usually about 1 tablespoon per cup of liquid. You can also experiment with adding spices like peppercorns, mustard seeds, or dill weed to enhance the flavor profile. Bring the mixture to a boil, stirring until the salt dissolves completely. Once boiled, remove from heat and let it cool before using it to pickle your ingredients. The brine solution is now ready to infuse your pickles with tangy goodness!
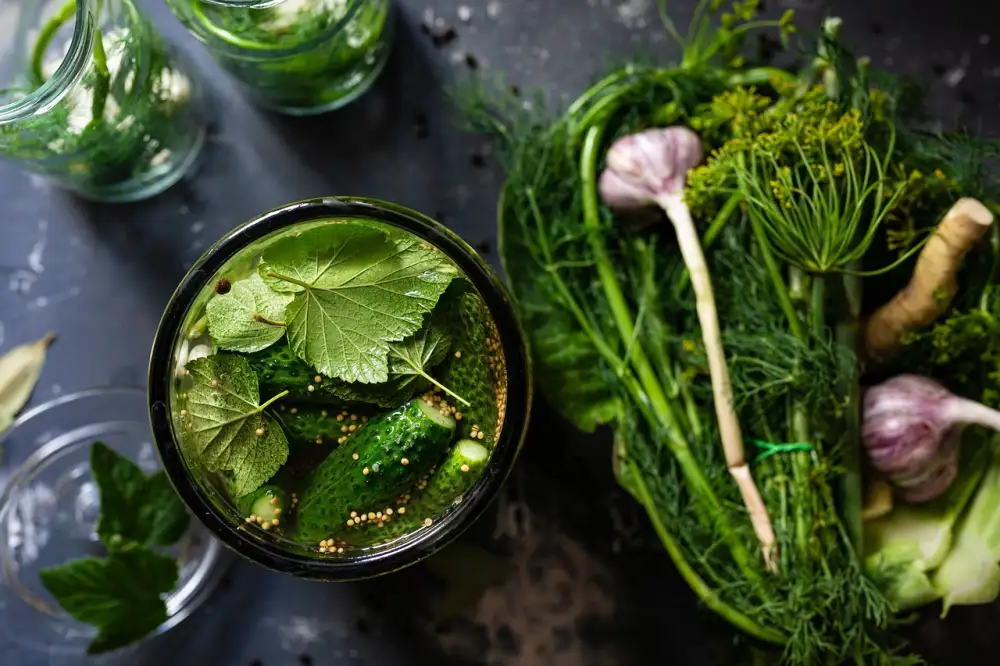
Preparing the Vegetables/Fruits for Pickling
Before you start pickling, it's important to properly prepare your vegetables or fruits. Start by washing them thoroughly to remove any dirt or debris. For vegetables like cucumbers, be sure to trim off the ends and slice them into your desired shape, whether it's spears, slices, or chips.
For fruits, such as peaches or strawberries, remove any stems or pits and cut them into bite-sized pieces. It's also a good idea to blanch certain vegetables like green beans or cauliflower florets before pickling to help maintain their crispness.
Once your produce is prepped, place them in a colander and sprinkle with salt. Let them sit for about an hour to draw out excess moisture. Rinse off the salt and pat dry with a clean towel.
By properly preparing your vegetables/fruits, you'll ensure that they absorb the flavors of the brine solution while maintaining their texture and crunchiness. So take your time and enjoy this crucial step in creating delicious homemade pickles!
Adding Flavor Enhancers
While pickling vegetables or fruits, you can enhance their flavor by adding various ingredients. Here are some popular flavor enhancers to consider:
1. Spices: Add a pinch of whole spices like mustard seeds, peppercorns, coriander seeds, or dill seeds to infuse a burst of flavor into your pickles.
2. Herbs: Fresh herbs like dill, thyme, rosemary, or bay leaves can add a delightful aroma and taste to your pickled creations.
3. Garlic and Onion: Adding slices of garlic cloves or onion rings can lend a savory and pungent note to your pickles.
4. Chili Peppers: For those who enjoy some heat in their pickles, adding sliced chili peppers or red pepper flakes can provide the perfect spicy kick.
5. Sweeteners: To balance out the tanginess of the brine solution, you can add a touch of sweetness with sugar, honey, or maple syrup.
Remember to experiment with different combinations of these flavor enhancers to create unique and personalized pickles that tantalize your taste buds.
Properly Sterilizing Jars
Properly sterilizing jars is a crucial step in the pickling process to ensure the safety and longevity of your homemade pickles. Start by washing the jars, lids, and bands in hot soapy water. Rinse them thoroughly to remove any soap residue. Next, place the jars upside down on a clean towel and allow them to air dry completely. Once dry, place the jars on a baking sheet and transfer them to a preheated oven at 225°F (107°C) for 10 minutes. Remove the jars from the oven using oven mitts and let them cool slightly before filling with your pickling solution. Remember, sterilized jars are essential for preserving the flavors and textures of your pickles!
Filling Jars with Pickling Solution
Once you have prepared your brine solution and vegetables/fruits, it's time to fill the jars with the pickling liquid. Start by carefully ladling or pouring the brine into each jar, leaving about ½ inch of headspace at the top. This space is important as it allows for expansion during the pickling process.
Use a clean spoon or spatula to remove any air bubbles trapped in the jars. Gently tap the jars on a countertop to help release any remaining bubbles.
Ensure that all vegetables/fruits are completely submerged in the pickling solution. Use a clean utensil, such as a chopstick or skewer, to gently push down any floating pieces and release any air pockets.
Wipe the rims of the jars with a clean, damp cloth to remove any spills or residue. This step is crucial for achieving a proper seal.
Finally, place sterilized lids on each jar and screw them on tightly. Make sure not to overtighten as this may prevent air from escaping during fermentation.
Now that your jars are filled with pickling solution and properly sealed, they are ready for the next step – storing and fermenting.
Sealing and Storing Pickled Foods
Sealing and storing pickled foods is a crucial step in the pickling process to ensure their long shelf life and flavor preservation. After filling the jars with the pickling solution and vegetables/fruits, it's important to properly seal them to prevent any air or bacteria from entering.
One common method of sealing jars is using canning lids and bands. Place the lid on top of the jar and secure it with a band, making sure it is tight but not overly tightened. This will create a vacuum seal during the pickling process.
Another option is using glass jars with rubber gaskets and metal clasps. These jars have airtight seals that keep out any contaminants.
Once sealed, store the pickled foods in a cool, dark place such as a pantry or cellar. The ideal temperature for storage is between 50-70°F (10-21°C). Avoid storing them in direct sunlight or near heat sources as this can affect their quality.
Properly stored pickles can last for several months to a year, depending on the ingredients used and the acidity level of the brine solution. It's recommended to let them sit for at least two weeks before consuming to allow flavors to develop fully.
Remember to label your jars with the date of preparation so you can keep track of their freshness. If you notice any signs of spoilage such as mold growth or off smells, discard them immediately.
By following these sealing and storing guidelines, you can enjoy the magic of homemade pickles all year round!
Pickling Troubleshooting Tips
1. Soft or Mushy Pickles: This can be caused by overripe or underripe vegetables/fruits. Ensure you choose firm produce and follow the recommended pickling times.
2. Cloudy Brine: Cloudiness in the brine can occur due to impurities in the water or insufficient sterilization of jars. Use filtered water and properly sterilize jars to avoid this issue.
3. Mold Growth: Mold growth on top of pickles can happen if the vegetables/fruits weren't fully submerged in the brine or if the jars were not properly sealed. Make sure to keep the pickles completely submerged and ensure a tight seal on the jars.
4. Softening of Spices: Sometimes, spices used for flavoring may soften during the pickling process, resulting in a loss of flavor intensity. To prevent this, consider adding whole spices or using spice bags that can be easily removed after pickling.
5. Excessive Salinity: If your pickles turn out too salty, it could be due to using too much salt in the brine solution. Follow recipes carefully and adjust salt quantities accordingly.
Remember, practice makes perfect when it comes to pickling! Don't get discouraged if you encounter any issues along the way. With these troubleshooting tips, you'll soon become a master at preserving perfection through homemade pickles.
Creative Pickling Ideas
1. Spicy Jalapeno Pickles: Add a kick to your pickles by adding sliced jalapenos to the brine solution. The heat of the peppers will infuse into the pickles, giving them a fiery flavor.
2. Tangy Beet Pickles: Slice beets thinly and pickle them with a mixture of vinegar, sugar, and spices. The vibrant color and tangy taste of these pickles make them a perfect addition to salads or sandwiches.
3. Sweet and Sour Cucumber Relish: Dice cucumbers, onions, and bell peppers and pickle them in a sweet and sour brine solution. This relish is great for hot dogs, burgers, or as a topping for grilled meats.
4. Pickled Watermelon Rind: Don't let watermelon rinds go to waste! Peel off the green skin and slice the rind into small pieces. Pickle them in a mixture of vinegar, sugar, and spices for a unique and refreshing treat.
5. Spiced Apple Chutney: Combine diced apples with onions, raisins, vinegar, sugar, and spices for a flavorful chutney that pairs well with cheese or roasted meats.
6. Pickled Eggs: Hard-boil eggs and place them in jars filled with a brine solution infused with herbs and spices like dill or garlic. Let them sit for at least one week before enjoying these tangy treats.
7. Asian-inspired Kimchi: Ferment cabbage with chili paste, ginger, garlic, and fish sauce for an authentic Korean kimchi that adds depth of flavor to stir-fries or rice dishes.
Get creative with your pickling adventures! Experiment with different combinations of fruits, vegetables, herbs, and spices to create your own signature pickles that will impress your friends and family.
In conclusion, pickling is a wonderful way to preserve and enhance the flavors of your favorite fruits and vegetables. With just a few simple steps, you can create your own delicious pickles right at home.
The art of pickling not only allows you to enjoy your favorite produce all year round but also provides numerous health benefits. From boosting digestion to increasing nutrient absorption, pickled foods are a great addition to any diet.
By investing in essential equipment such as jars, lids, and a canning pot, you can ensure that your pickles are properly sterilized and stored. Choosing the right ingredients and preparing them correctly will result in perfectly crunchy and flavorful pickles.
Don't be afraid to get creative with flavor enhancers like herbs, spices, and even garlic cloves. These additions can take your homemade pickles to the next level.
Remember to troubleshoot any issues that may arise during the pickling process. Whether it's adjusting the brine solution or addressing mold formation, there are solutions for every problem.
Finally, let your imagination run wild with creative pickling ideas. Experiment with different combinations of fruits and vegetables or try unique flavor profiles like spicy jalapeno or tangy ginger.
So go ahead, unleash your inner pickle master and experience the magic of homemade pickles. Your taste buds will thank you for it!
Published: 16. 01. 2024
Category: Recipes